 Disclaimer: Some of the links in this article are affiliate links, where I earn a small commission if you click on the link and purchase an item. You are not obligated to do so, but it does help fund these pages and my craft, with the hopes of bringing value to you. Safety first! When working with wire, gloves should be worn to prevent cuts, blisters, and any other unwanted abrasions! I have also grazed my eyes a few times with the wire ends (Yikes!), so safety glasses are useful too. For aluminum wire, I just use standard latex gloves, but with steel wire, heavier duty gloves might be needed. You also need to have a few other tools before we get started. You will want to have some decent wire cutters, a tape measure, and a skinny round object to wrap wire around, I use a nail I found in my garage. This is a great start, but you might need to get a few more things depending on what your plan is, so let us figure that out! 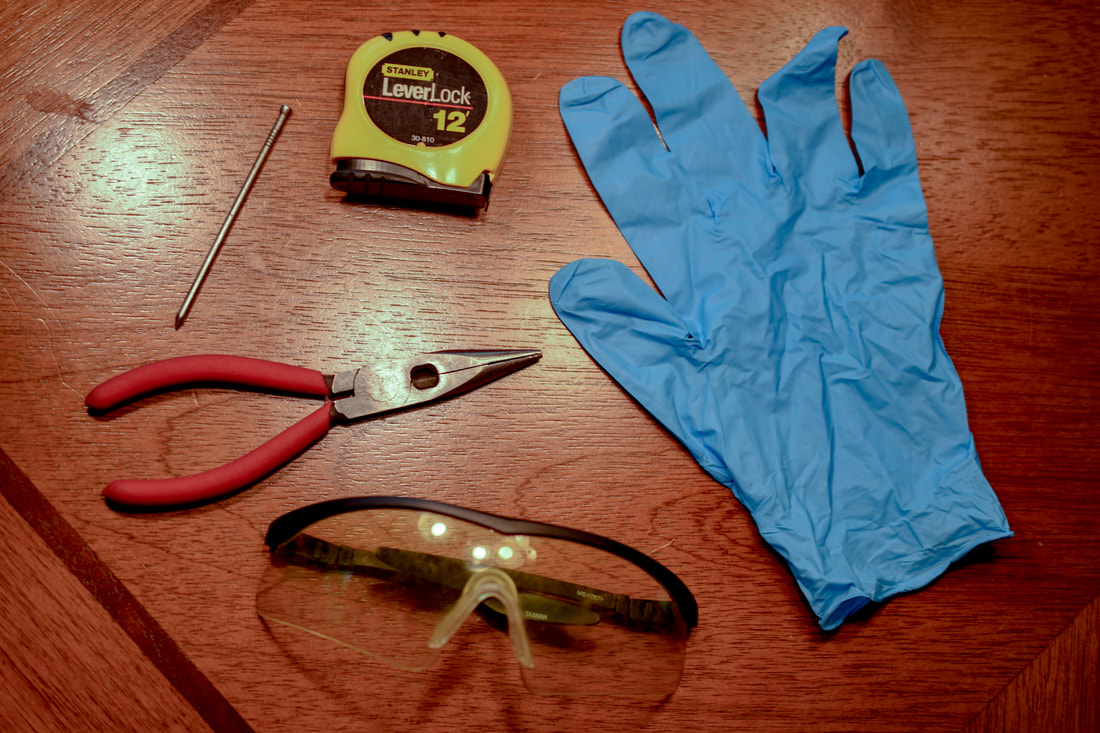 Wire Types What type of wire are you going to use? For me, this decision is either steel or aluminum. Steel is sturdy, so if I want to make a jewelry hanger or a tree that is more bump resistant, this is what I go with, but it is more difficult to work with. I typically use 20-gauge, galvanized steel, braided hanging wire or for the tree body. I get braided wire because you get so much more wire for your buck. If you find where to buy 20-gauge brown steel wire, please let me know! I use 22-gauge Floral wire for the leaves. Aluminum is much easier to work with and has many more color options, so if I want to make something colorful, this is my choice. I get my aluminum wire from BeebeeCraft. BeebeeCraft offers free shipping on purchases over $25! If I am making a solid-colored tree, I like using 20-gauge wire, but if I am doing a multicolored tree, I use the slightly thicker, 18-gauge wire for the body of the tree and use 20-gauge wire for the leaves. 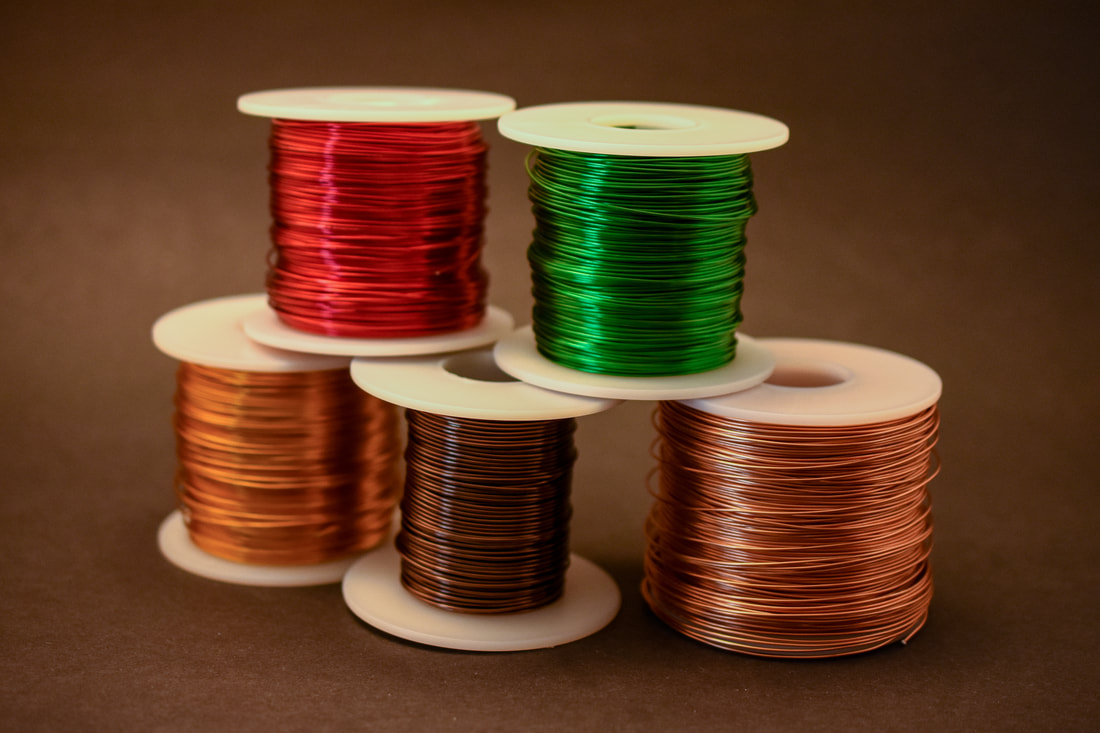
Choosing your Base How are you going to display your sculpture? I like to either “pot” my trees or attach them to some wood I have found. Potting them can be a little easier, but costs a little more. The thing I find difficult about wrapping around wood is getting the balance right at the end so that it stays upright, but I do love the natural look when it works. If you choose to pot your tree, then you will obviously need a pot or something similar. Whenever I am out thrifting, I keep my eyes peeled for little dishes or pots that I can use, otherwise I just order the pots online. You will also need some rock filler medium to go into the pots. You can get this all over the place, but here are a couple of the spots that I use. Michaels has a decent variety and so does Amazon, but your local plant nursery does too, so check them out and support local, they will also have cute pots. To keep the everything solidified so nothing spills out, I use Elmer’s Clear Glue. Planning Now that you have all of that planned out, what length of wire are you going to use? This will depend on your previous decisions and personal preference. To measure it out, start with the roots, hold the wire out to roughly gauge the distance you want your roots to go. If this is on a piece of wood, start where the base of your tree will sit and go to wherever the furthest spot you want your roots to end. If it is a pot, similarly, start around the middle of your pot, level with the rim and go out the edge and down to the bottom. Now that you have the rough length of your roots, decide how tall you want the body of your tree and add the two lengths together. I typically use about two feet for my leaves, whether that is a separate color, or adding to the single-colored tree length I have already measured out. Now that you know how long each wire will be, decide how many of each length you will need. I do not typically use less than 30, but you can always cut more or use less as you feel. Generally, for a multicolored tree, I use the same number of wires for leaves as I do for the body, but if you want a fuller feel to your tree, by all means go for it.
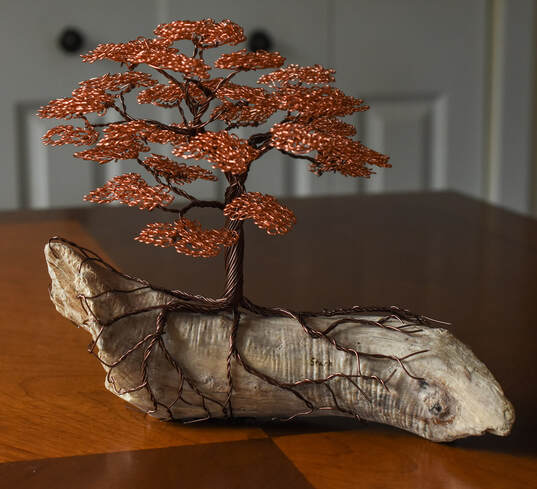
Getting Started Now for the construction! I always start out the same, by making a twist where the trunk starts, taking care not to use up any length set aside for the roots. If you find it helpful, you can add a piece of electrical tape to keep things a little more secure at this spot. Potting If I am potting the tree, I will then make all of the roots structure by twisting off sections of the trunk, being sure to split and merge the roots as I go out from the center. Once I am satisfied with the roots, I fold them down in a ring so that they fit into my pot. Then I add the rocks so that some of my roots are showing on the surface and they are flush with the edge of the pot. Once you are satisfied with the way things look at this stage it is time to add the glue to secure it into place. I don’t recommend just pouring the glue straight on, as I have made many sticky messes this way. Because of how thick the glue is, it takes a moment to seep through the cracks in the rocks. Instead, I use a spoon or a straw to add glue to wherever is needed. I don’t recommend filling your pot as that would take forever to dry, but once you’ve gone over the surface a couple of times, each time letting the glue slip through the rocks, let it dry. This will probably take a few hours, but once it is, you can check to make sure everything is secured by slowly and carefully tipping your pot side to side. If more glue is needed, go for it. 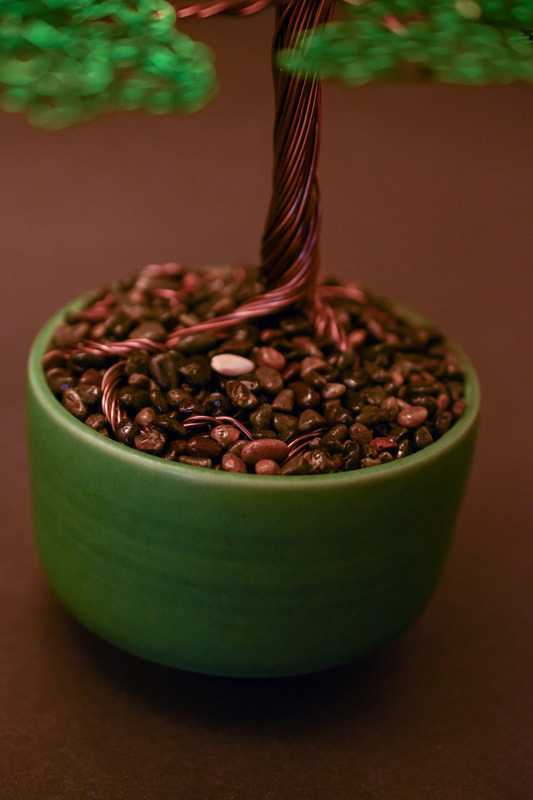 Wood Wrapping Find the balancing point and test it out by applying some downward pressure. If the wood wobbles, you may need to pick a different spot for your trunk. Starting this is tricky, but I recommend going slowly and follow the grooves of your wood. Start your roots by twisting sections from the base of the trunk. You might wish you had more hands to keep everything in place as you worked, but this is a luxury we do not normally get. You will want to be sure to have the roots wrap around the bottom of the wood at some point, as this will be the only way of securing your tree to the base (I have seen some people use a staplegun to secure their tree, but have not dabbled in that craft myself). To get it nice a tight, merge the roots under the base and give them a few twists until you feel secure and then trim the excess away. You’ll want multiple points where this happens, but be careful to not make these little root balls in a spot that changes the balance of the wood and how it rests. Remember you can trim away any abundance of roots that you want. 
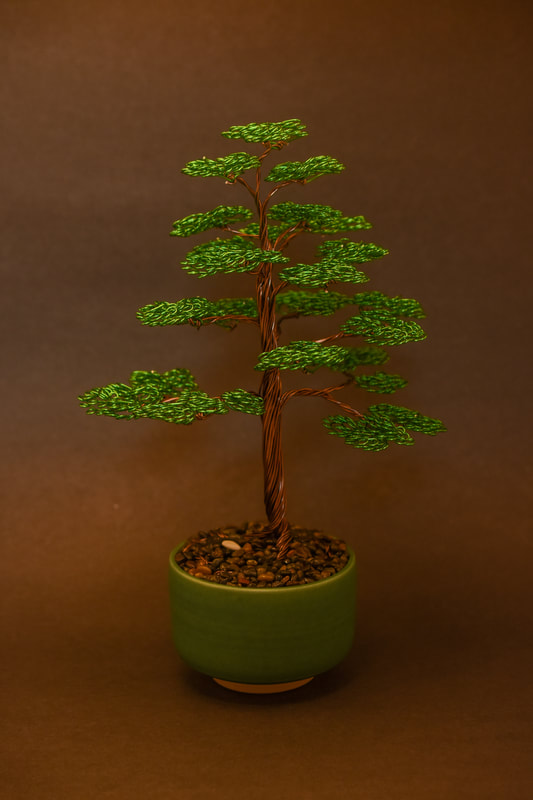
Trunk and Branches Once you have finished your roots and base, you will move onto the trunk and branches. For the trunk, make a slow, tight twist of the wire and add any bends and curves that you would like. For branches, you’ll want to pull down groups of wire so they are approximately perpendicular to your trunk and twist that grouping separately from the main body. Be sure to twist in the same direction as you were for your trunk or else you might start unwinding down the trunk. I find it looks more natural to try to grab your group of wires for the branch such that it comes from the opposite side of the tree and then twist the trunk up around it. As your branches fork, be sure to leave at minimum two wires at the end of each branch or else it will be more difficult to attach your leaves later on. You will also want at least an inch of wire at the end of each branch that can be used to attach the leaves. I usually trim the excess ends of my branches to this length. Leaves After your trunk and branches have been shaped and you have left enough wires and space at the end of each branch, we will attach the leaves. To do this, we will find the middle of the wires that we plan to attach to the end of a branch and give them a slight bend in the center. Then we will line the center up with the end of the branch and tightly wrap the extra inch of wire we left around each side of the leaf wires. Once you have your leaf wires attached, it is time to start making the leaves. This is the most time-consuming step in my experience. I personally like circular bushels, but you do you, try different styles out! To make the circular bushels, you will need a thin cylindrical object (I use a nail). Starting at the end of the leaf wire, wrap around the nail one time, then pull your object out and hold it against the wire so that you can make another loop right next to the first. You will continue down the wire until you are pretty close to your branch. You should now have a long line of loops. Starting from the end of the wire again, wind or roll up your loops so they are in a circle. As you do this for each leaf wire, you can shape your bushels of leaves however you like. You Finished! Go forth and create! Let me know how your crafting goes! Please feel free to send me a message with any questions you might have, I would be happy to answer! Don’t forget to follow me on Instagram, Pinterest, and TikTok.
0 Comments
|

Jacob StarkI'm an artist out of the PNW and just want to share some helpful things I've learned. If you've found anything here useful or interesting, I always appreciate a share, thank you. =) Articles
|
 RSS Feed